Shopify用WooshPay決済プラグイン #
顧客の希望する支払い方法に対応することで、より多くの顧客を獲得する。
WooshPayアカウントにつき1店舗のみ接続可能です。
対応通貨米ドル、英ポンド、ユーロ
対応支払い方法Visa、Mastercard、SEPA Bank Transfer、Sofort、Przelew24、POLi、Zip、PayNow、BPI、Gcash、Kakao Pay、Rabbit Line Pay、Akulaku PayLater、Dana、Giropay、Trustly、 エプス オーバービューBancontact、Klarna、Klarna Pay Now、Klarna Pay Later、iDEAL、ShopeePay、QRIS、QR Prompt Pay、Boost、Touch n Go、TrueMoney Pay、Alipay HK、Union Pay、FPX、WeChat Pay、Mandiri。
利用可能な国アフリカ, アジア, 中央アメリカ, ヨーロッパ, 北アメリカ.
ステップ1: WooshPayペイメントを始める #
WooshPayアカウントでは、以下のことが可能です:
- プラグインを有効にして設定します。
- サンドボックスモードにアクセスし、支払いをテストする。
- 支払報告書を見る
- KYBのステップを完了し、アカウントを完全に有効化してください。
ステップ2:Shopifyへのインストール #
2-1.Shopifyアプリのページに移動します。 リンク.
2-2.Add Appボタンをクリックし、リストからShopifyストアを選択します。ストアがリストにない場合は、[ショップURLでログイン]リンクをクリックします。
2-3.アプリのインストールボタンをクリックします。
ステップ3:Shopfiyパートナースタッフに頼んでShopifyプラグインを有効化する #
ショップのアクティベーションメールを以下に送信してください。 wooshpayパートナーアカウント.パートナースタッフが3営業日以内にアカウントを有効にします。
あなたのお店についてメールで教えてください。
| ショップ名 | ショップURL | 決済完了時のリダイレクトURL |
|---|---|---|
| 例:私のshopifyストア | マイショッピイストア | ホームページドットコム |
注:複数の店舗をお持ちの場合は、すべてをお知らせください。
ショップアクティベーションの代替WooshPayダッシュボードでShopifyプラグインを有効化する。近日公開予定。
ステップ4:Shopifyプラグインのテスト #
4-1.ページの一番下までスクロールし、Activate WooshPay ボタンをクリックします。セットアップセクションで、Enable test mode チェックボックスを選択し、Save ボタンをクリックします。
4-2.顧客としてShopifyストアにアクセスし、商品をカートに入れます。

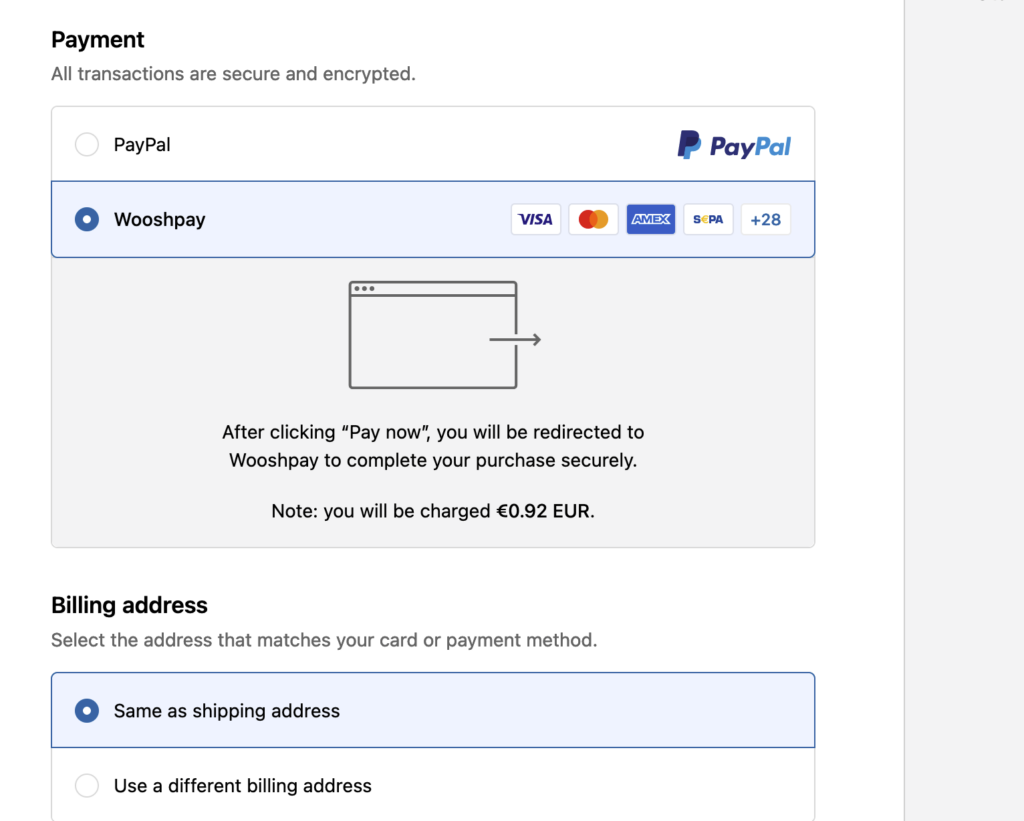
4-3.顧客情報を追加し、支払い画面に移ります。支払い方法としてWooshPayを選択します。
4-4.ブラウザは支払いを完了するためにWooshPayチェックアウトページにリダイレクトする。
4-5 プラグインのテストが終わったら、本番モードに切り替えることができます。
準備万端だ! #
もう大丈夫だ。
その他ご質問やサポートが必要な場合は、お気軽に下記までご連絡ください。 尋ねる.


